SAIBOKU W
- Image Anotation Tool -
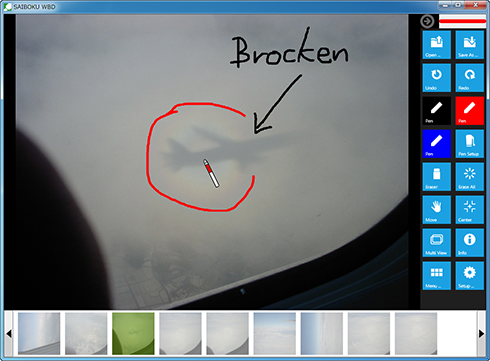
"SAIBOKU W" let you draw on picture by tablet or mouse.
You can draw JPEG/PNG/BMP files.
Download
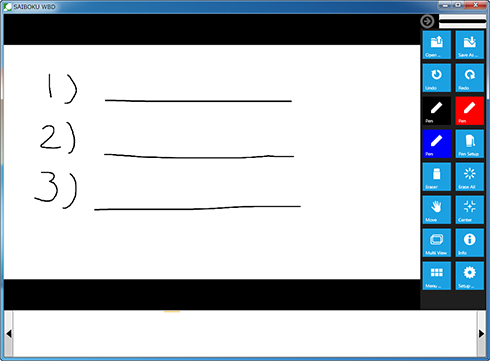
You can change to whiteboard from image by one click. Because it has the window only for the projector, you can show the presentation without your showing signs that the menu is selected. And you can use SAIBOKU W as a white board of SAIBOKU D.
License
The Software is provided "AS IS," without a warranty of any kind.
In no case shall the author be liable for any damage or unwanted behavior of any computer hardware and/or software.
No Rental. Customer may not rent or lease the SOFTWARE to someone else.
All title and copyrights in and to the SOFTWARE (including but not limited to all images, photographs, animations, video, audio, music, text, and other information incorporated into the SOFTWARE), the accompanying printed materials, and any copies of the SOFTWARE, are owned by KANAE PROJECT.
The SOFTWARE is protected by copyright laws and international treaty provisions.
Accordingly, Customer is required to treat the SOFTWARE like any other copyrighted material, except as otherwise allowed pursuant to this LICENSE and that it may make one copy of the SOFTWARE solely for backup or archive purposes.
Operating environment
Windows 64bit
Windows XP/Vista/7 64bit
Windows 32bit
Windows XP/Vista/7 32bit/64bit
File List
| File Name | Details |
|---|---|
| SAIBOKU_WBD.exe | SAIBOKU W Program |
| Readme.txt | SAIBOKU W readme first text |
Install & Uninstall
Install
There is no installer.
Uninstall
You can uninstall only by deleting the file called SAIBOKU_WBD.exe.
How to use this program
Boot SAIBOKU W.
Double-click SAIBOKU W icon. Then, the white board windows is displayed.
If you drag and drop a image file to SAIBOKU W icon, dropped image is displayed.
Load image file.
Click the button on the tool bar. If you cannot see it on the tool bar, Click the
  button. And click the button on the menu.
You can change a mode by one click.
If you click the image in the footing of the window, the selected image is displayed.
And you can change to the listed image file by
 buttons.
Showing the whiteboard.
Your click of the button will show the whiteboard.
Changing move mode and drawing mode.
You can change move mode and drawing mode by the button.
Toolbar
The tool bar is shown on the left side side of the window.
| Icon | Function |
|---|---|
 Save |
You can open the image file. |
Save |
The desktop image is saved at the folder set by naming automatically. |
 Save As |
On the Save dialog, the desktop image sets the file name, format, and the archive place folder, and is saved. |
 Undo |
You can undo the line which you drew. When you do erase all or change to white board, you cannot use it. |
 Redo |
You can redo what you undid. |
Previous |
You can display a front picture in order of the name in a folder with the picture which you are displaying. |
Next |
You can display a following picture in order of the name in a folder with the picture which you are displaying. |
 Eraser |
You can erase the line which you draw. |
 Erase All |
You can erase all you draw. |
 Zoom + |
You can expand a image. An image will be expanded if you turn the wheel of mouse. |
 Zoom - |
You can shrink a image. An image will be shrunk if you turn the wheel of mouse. |
Move |
You can move the expanded image. |
Whiteboard |
The whiteboard is displayed. |
 Center |
The position and amplification are adjusted so that the shown whole image can be shown. |
 Pen/Marker |
You can choose the displayed pen which was stocked. |
 Pen Setup |
The pen setup dialog is displayed. You can change the color of the pen, the type, thickness. |
 Lasso |
The line which you drew is surrounded and moved by dragging. |
 Multi View |
You can show the window for showing on the projector on another monitor.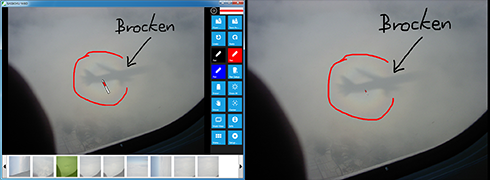 |
 Turn Left |
You can rotate the image on the left. |
 Turn Right |
You can rotate the image on the right. |
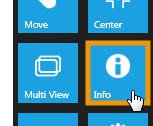
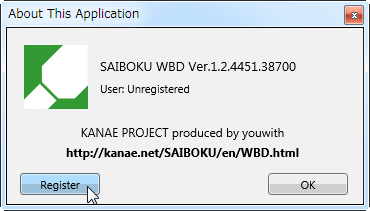
 Info |
Info Dialog is displayed. You can register your license. |
Menu |
All the menus which you can use are displayed. |
 Setup |
The setup dialog is displayed. |
 Close |
Application is closed. |
You can customize disposition of the button in the setup dialog.
Setup
PenSetup
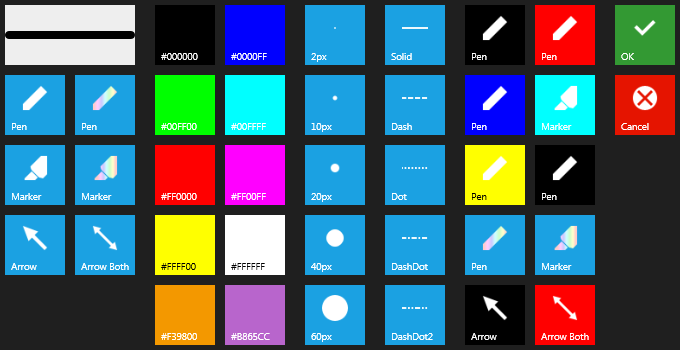
You can choose the kind of pen, thickness, the color, the kind of line, and the stock pen.
Menu
All the menus which you can use are displayed.
Setup - Stock Pen
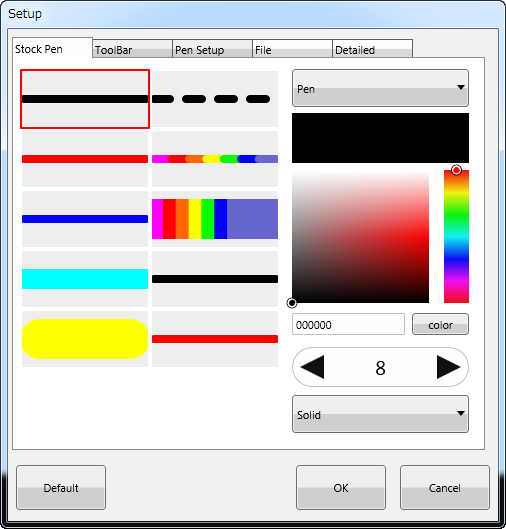
You can change the pen kind, the color, thickness, and the line style of the stock pen.
Setup - Toolbar
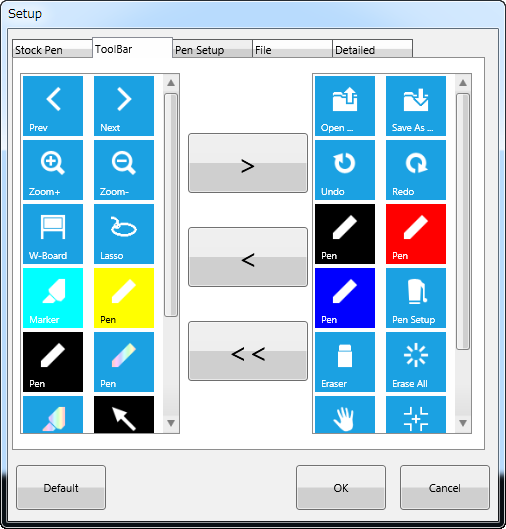
You can choose from the menu button the button displayed on the toolbar.
Setup - Pen Setup
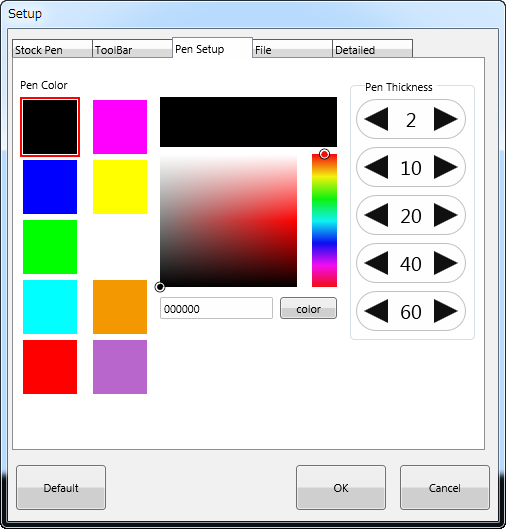
You can set the color and thickness of the pen which are displayed on the Pen Setup dialog.
Setup - File
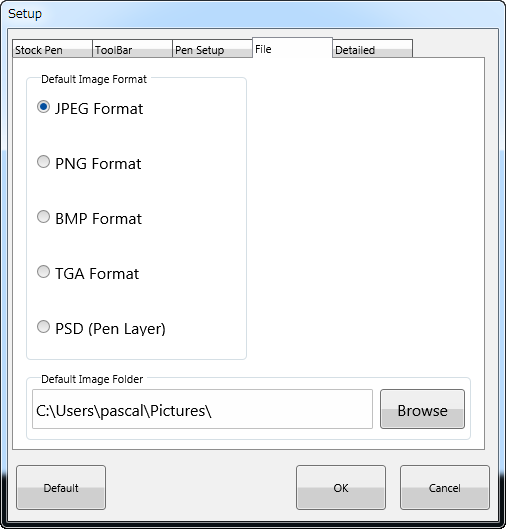
You can set the format and the archive place folder of the file which are saved with the Save button.
Setup - Detailed
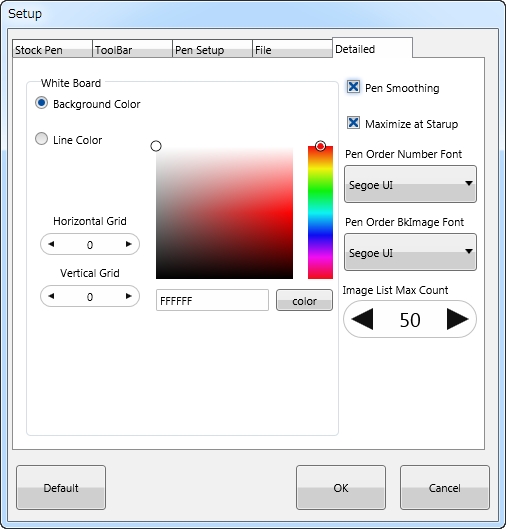
White Board: You can setup the whiteboard option.
Pen Smoothing: The line of a pen is smoothed.
Image List Max Count: You can set the maximum number of the image list to show.
If you change this, the image list is reloaded.
Keybord Shortcut
Ten keypad
| Key | Details | Key | Details |
|---|---|---|---|
 |
You can change to the next stock pen. |  |
You can erase all you draw. |
 |
The desktop image is saved at the folder set by naming automatically. |  |
You can expand a image. |
 |
You can shrink a image. |  |
You can rotate the image on the right. |
 |
You can rotate the image on the left. |  |
The whiteboard is displayed. |
 |
You can move the expanded image. |  |
You can move the image upwards. |
 |
You can move the image downward. |  |
You can move the image to the left. |
 |
You can move the image to the right. |  |
The position and amplification are adjusted so that the shown whole image can be shown. |
History
09/26/12 SAIBOKU W 1.0
-First release
How to register
- Please click Info button on the toolbar.
- Please click the "Register" button.
- Please enter the User Name and License Code.
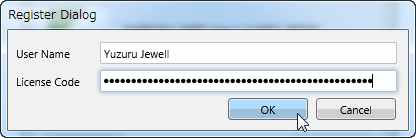
- Please click "OK" button.
Thanks to KJ Georgette for help with this Readme file.