TATARA 6.0
-Sculpted Prim Previewer and Editor -
Latest Version is here.
by Yuzuru Jewell(KANAE PROJECT) produced by youwith. 05/12/26
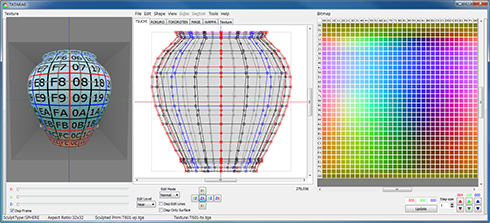
TATARA displays both: a Sculpted prim and its texture.
TATARA outputs Collada files for sculpted prims for the mesh feature of Second Life.
Sculpted Prims can be edited in the five modes:
ROKURO/TOKOROTEN/MAGE/WAPPA/TSUCHI.
The five modes can be combined and used together.
Furthermore, TATARA can correct coordinates for every control point in the BITMAP and TSUCHI mode.
For more information on the different modes, see below.
It is not guaranteed that a display of the prim in TATARA will be exactly the same as the appearance of the Sculpted Prim in Second Life.
TATARA 6.0 users can use their password.
TATARA 3.0, 4.0 5.0 users need to purchase an updated license from the serial box in SL at: KANAE PROJECT Shop.
Now, ROKURO Pro 3.0 Users can upgrade to TATARA 6.0.
Download
TATARA 6.205The trial period is for three days.During the trial period, you cannot export Sculpted Prim files. |
Win 32bit
Virus checked by NOD32 ver.6742. |
Balloon plug-in 120526 [option] |
Win 32bit
Virus checked by NOD32 ver.7170. |
Height Cloth plug-in 120521 [option] |
Win 32bit
Virus checked by NOD32 ver.7153. |
Cloth plug-in 120428 [option] |
Win 32bit
Virus checked by NOD32 ver.7089. |
Boxes plug-in 111105 [option] |
Win 32bit
Virus checked by NOD32 ver.6603. |
Twisted Ring plug-in 110909a [option] |
Win 32bit
Virus checked by NOD32 ver.6574. |
Coil plug-in 110809a [option] |
Win 32bit
Virus checked by NOD32 ver.6574. |
Panels plug-in 110627a [option] |
Win 32bit
Virus checked by NOD32 ver.6574. |
Cam plug-in 110806a [option] |
Win 32bit
Virus checked by NOD32 ver.6574. |
Gear plug-in 110827a [option] |
Win 32bit
Virus checked by NOD32 ver.6574. |
License
The Software is provided "AS IS," without a warranty of any kind.
In no case shall the author be liable for any damage or unwanted behavior of any computer hardware and/or software.
No Rental. Customer may not rent or lease the SOFTWARE to someone else.
All title and copyrights in and to the SOFTWARE (including but not limited to all images, photographs, animations, video, audio, music, text, and other information incorporated into the SOFTWARE), the accompanying printed materials, and any copies of the SOFTWARE, are owned by KANAE PROJECT.
The SOFTWARE is protected by copyright laws and international treaty provisions. Accordingly, Customer is required to treat the SOFTWARE like any other copyrighted material, except as otherwise allowed pursuant to this LICENSE and that it may make one copy of the SOFTWARE solely for backup or archive purposes.
Operating environment
Windows XP/Vista/7/8 64bit/32bit
The environment where "Second Life" operates.
Install & Uninstall
Install
There is no installer.
Uninstall
You can uninstall only by deleting "TATARA" file.
The Features of TATARA
How to use Preview
You can drag an object and make it rotate.
You can see a sculpted prim in more detail than ROKURO Pro.
A red point is the control point chosen.
An orange line is the section chosen.
The gray lines are sections which are not chosen, and will not move or be adjusted.
A green line is a joint of the sculpted prim.
You can stretch the object by x,y,z trackbars.
Disp Frame - You can check the maximum size of a sculpted prim.
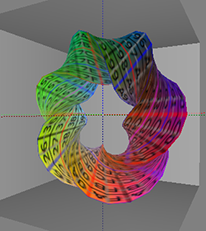
You can hide the preview with the left edge button.
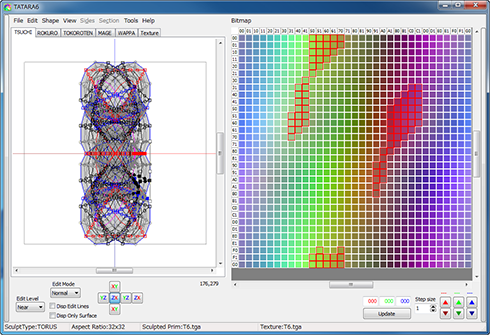
How to use Edit
You can select a single control point or a range of points to move together.
You can also lock the selected control point(s).
When you drag the edit pane while holding the SPACE key, you can move the view of the edit pane.
You can edit selected area by two edit modes. You can change it by Edit Mode combobox on the left-bottom of edit pane.
Normal Mode: The 9 control points for editing the selected area are displayed.
When you drag the 8 control points of selected area, the selected points are rotated or moved together.
When you rotate the selected control points with holding SHIFT key, the rotation angle is adsorbed by the grid.
The center control point of selected area is the center of the rotation.
When you drag the 8 control points of selected area with holding down the CTRL key, the selected control points are scaled from the center of the selected area.
When you drag the corner control points of selected area while holding down the SHIFT key and CTRL key, the selected control points are distorted.
Worp Mode: The 12 control points are displayed around the selected area.
When you drag the control points of the selected area, the selected control points are scaled from the center of the selected area.
When you release the selection, the selected control points are modified.
When you click the "o" button on the left-bottom of edit pane, the selected control points are modified.
*The stretching has limits; if you want to know more, please watch following tutorial video.
If you want to know it more, please check following tutorial video.
The Tabs in TATARA
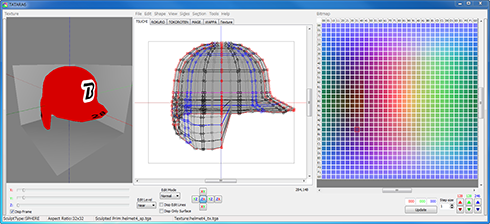
TSUCHI
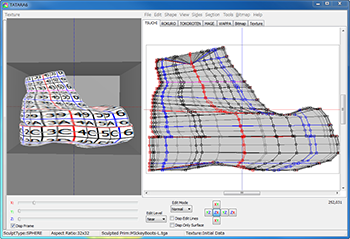
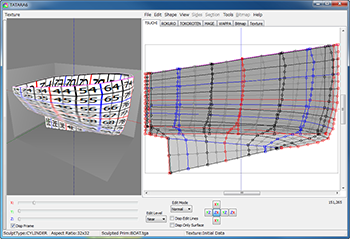
The object displayed by Orthographic projection from three directions is edited.
You can change the direction displayed with the 6 buttons marked XZ, YZ and XY below the grid.
If you check "Disp Only Surface", you can edit only the control point which is on the face displayed.
If you uncheck "Disp Edit Line", only the edit line selected by "Edit Line" on the View menu will be displayed.
ROKURO
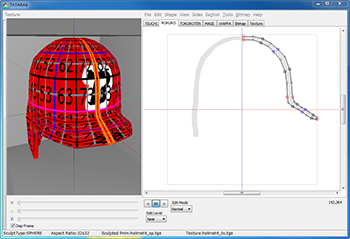
ROKURO is a Japanese turning lathe, a potter's wheel. ROKURO mode makes a solid lathe-type object.
The buttons on the lower left beneath the grid "<" and ">" choose the section to edit.
TOKOROTEN
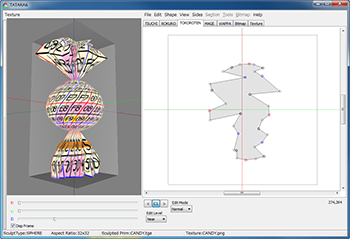
TOKOROTEN is Japanese extruded jelly. TOKOROTEN mode makes a pushed-out object.
The buttons on the lower left "<" and ">" choose the section to edit.
MAGE
MAGE means bending in Japanese.
MAGE mode makes shapes similar to bent pipes such as a neon tube.
The buttons on the lower left "<" and ">" chooses the section to edit.
You can change the direction displayed with the 6 buttons marked XZ, YZ and XY below the grid.
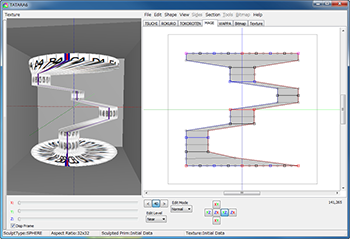
WAPPA
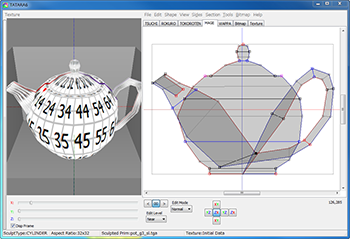
In WAPPA, a section of MAGE is edited.
The center of a section is moved to the center of the edit display.
The buttons on the lower left "<" and ">" chooses the section to edit.
*Shapes using a combination of MAGE and WAPPA can be made.
However, these may not be entirely satisfactory.
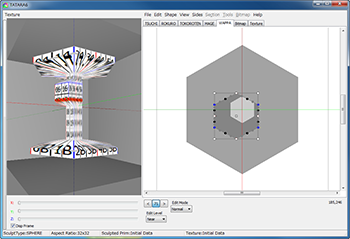
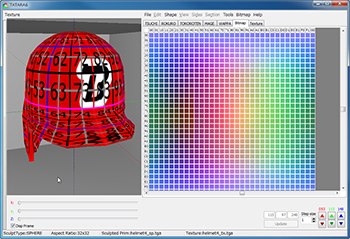
Bitmap
If you left-click and drag in the grid area, you can choose control points.
You can also select multiple points by holding down the Shift Key.
Selection and release are determined by the control point clicked first.
You can reveal a pop up menu by right-clicking.
The control points can be adjusted in 1 or more pixel increments by changing the numeric value in the text box below the grid.
Texture
Here you may draw a texture, or draw on a texture you have already loaded.
- Black Button
- The color of the drawing pen is black.
- Red Button
- The color of the drawing pen is red.
- Blue Button
- The color of the drawing pen is blue.
- White Button
- The color of the drawing pen is white.
- Eraser Icon Button
- Eraser
A straight line can be drawn, by holding down the shift key while dragging the mouse.
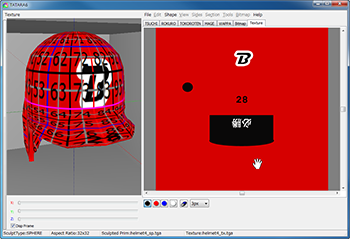
How to use the Menus:
Texture (On the far left of the menu bar)
- Reset
- Returns display to default texture.
- Load [FileName]
- You can reload the texture which is displayed currently without displaying a dialog box.
- Load
- The image which will eventually cover your shape will be loaded. The software resizes the file size to 512x512. The file types that can be used are JPEG/PNG/BMP/PSD.
TATARA judges Stitching Type of a Sculpt Map automatically. When it is not being recognized correctly, please use my application "NUIME". - Save
- You can save a texture. The size of the texture on a 32x32 sculpted prim is 512x512. The size of a texture changes by the number of vertexes. The file types that can be saved are PNG/TGA.
- Divided Save
- While you are editing two or more sculpted prims, a texture is divided and saved for every sculpted prim from an original texture file.
File
- New
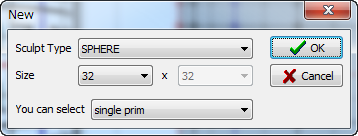
You can choose one type among Sphere, Torus, Plane and Cylinder.
You can select the size of an object from 4, 8, 16, 32 (Default), and 64,128,256. Height and width are selected separately. A big object is divided and saved into two or more sculpt-map files when you save it.
*The divided sculpt-map file cannot be merged.
"You can select" - Here you may select whether your project is a single prim or multiple prims.- Load
- Sculpted Prim Texture is loaded from a bitmap or original XML file format. The formats of the image which can be loaded are .tga .jpg .bmp .png .obj .txt.*You cannot load the text template file format before TATARA 4.X.
*You can load the sculpt-map file of the size of 64x64/128x128/256x256/512x512.
*There is no compatibility in the ROKURO and TOKOROTEN export files. Only ROKURO's 33-point file is compatible.
*You can't load Collada file. - Save [FileName]
- You can save the object file which is displayed currently without displaying a dialog box.
- Save
- A sculpted prim bitmap (.tga), .obj file, and XML file is specified and outputted.
*An output sculpted prim bitmap's size is 64x64/128x128. The .obj file can be used by Wings3D and Blender.
*The XML file has the information on the stretch of an object.
*When you upload multiple sculpted prims, please set their "Stitching Type" to plane.
*If you output multiple sculpted prims, you can output the prim position information used by TSUBO to a text file.
*You can save Collada file for the mesh feature of Second Life. The same UV map as the sculpted prim is outputted. Only High "Level of Detail"(LOD) is outputted.
When you select it, you can select following option.
- Scale
- You can set the scale of the object.
- Hard Angle
- You can specify the hard angle of normal vector.
- The optimized vertices
- The vertices are optimized. Almost the same UV map as the sculpted prim is outputted.
- Save .dae and .obj file
- The optimized OBJ file is outputted together. Because the Collada file and the OBJ file use the same texture file, you can use it with SOMATO.
- Setup
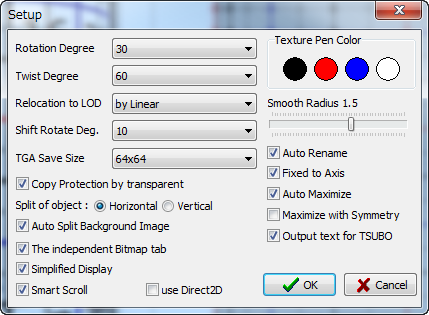
You can set up Rotation Degree and Twist Degree.
You can set up the TGA size of file to save. 64x64 is the recommended size.
You can set up the degree when you turn the selected control point with Shift key.
- Relocation to LOD
- You can choose the way of rearranging control points according to Level of Detail. It is only for preview pane. Please use Edit Level on the left-bottom of the edit pane.
- None
- The control points aren't rearranged.
- by Linear
- The control points are rearranged by linear.
- by Parent
- The control points stick to the control point of the standard.
- by Subdivision
- A control point is rearranged on the curve.
- Copy Protection by transparent
- When a Prim is modified, you can make it transparent to prevent the texture from being copied by screen capture.
- The independent Bitmap Tab
- The Bitmap tab is displayed on another pane.
Checked 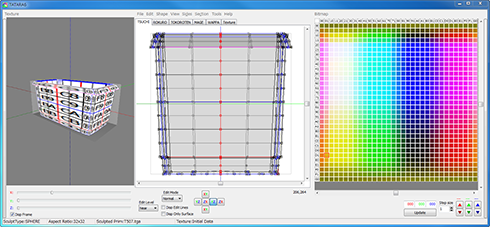
Not checked 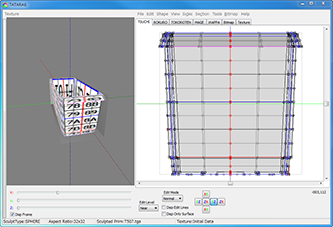
- Split of object
- You can specify the direction where an object is divided into a sculpt-map file.
One Prim 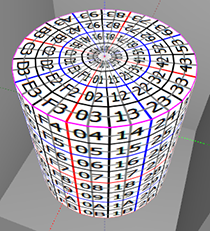
Horizontal 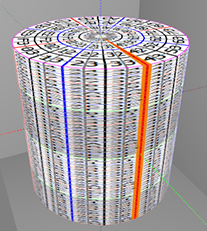
Vertical 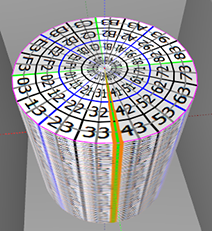
- Auto Split Background Image
- You can use the background image created by UTSUSHI in TSUCHI mode.
- Output text for TSUBO
- TATARA outputs the text information for reconstructing multiple prims in a second life. (You can use it with TSUBO.)
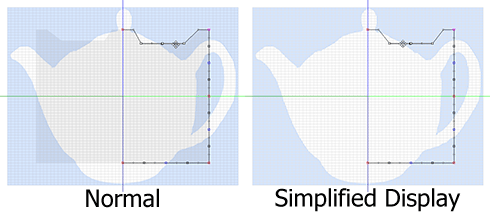
- Simplified Display
- The function for a more smooth edit.
When you drag a mouse, the editing pane has a part omitted and is displayed at high speed.
- Use Direct2D
- You can use Direct2D on Windows 7.
- Smart Scroll
- You can use smart scroll on Edit Pane.
- Texture Pen Color
- You can set Texture pen color.
- Smooth Radius
- You can set up the level of Gauss smoothing.
- Auto Rename
- When saving a file, you can change the name of a file automatically so that it may not be overwritten.
- Fixed to Axis
- You can separate the upper and lower points from the center of rotation in ROKURO and TATARA mode.
By the coordinate system of Second Life
You can save your sculpt-map file by the coordinate system of Second Life. - Auto Maximize
- You maximize a sculpt-map file automatically and save it.
- Maximize with Symmetry
- You can maximize your object with symmetry by Maximize on Edit menu.
- Exit
- The program is ended.
Edit
- UNDO/REDO
- There is a 256-step UNDO and REDO function.
- Select All
- All the control points currently displayed are chosen. The control point which is not displayed in an edit display is not chosen. When you choose more than one control point, the following "Edit" functions are also available from a right-click popup menu. When you don't select any control points, the popup menu is not enabled. Using your mouse, draw a box around the points you want to control together, or select them individually while holding down the "Shift" button.
- Rotate+
- A chosen control point turns counterclockwise around those centers of gravity.
- Rotate-
- A control point turns clockwise around the center of gravity of the chosen control point.
- Horizontal Align
- Chosen control points are lined up on the horizontal axis.
- Vertical Align
- Chosen control points are lined up on the vertical axis.
- Equal Intervals
- The interval of three or more selected control points is evenly arranged.
- Equal Distance
- The selected control point is rearranged at equal intervals on the line which connects them.
- Twist+/Twist-
- The object is twisted. While displaying the TOKOROTEN tab, only the control point of the side is twisted.
- Optimize(TOKOROTEN Mode only)
- The location of the control point which is inside is optimized.
- Same width
- While working in the MAGE tab, the thickness of the object is made the same. (MAGE Tab only)
- Flip Vertical
- The upper and lower sides of Prim are reversed.
- Flip Horizontal
- The left and right sides of Prim are reversed.
- Maximize
- An object is maximized.
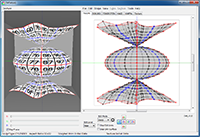
- Mirror X0-GG from 00-XG
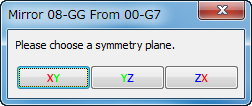
Creates HORIZONTAL symmetry by mirroring X0-GG from 00-XG, which is the horizontally symmetrical position.
You can choose the symmetry plane.
The caption is changed according to the aspect.
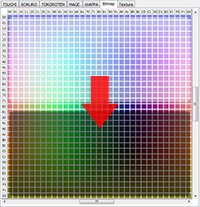
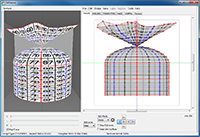

- Mirror 0X-GG from 00-GX
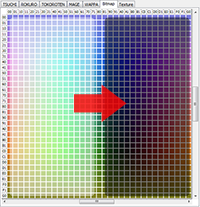
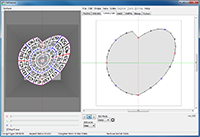
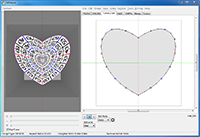
- Creates VERTICAL symmetry by mirroring 0X-GG from 00-GX, which is the vertically symmetrical position. You can choose the symmetry plane. The caption is changed according to the aspect.

- Inside Out
- An object is made inside-out. (Bitmap Tab only)
- Offset
- You can replace a control point.
- Magnet
- The selected control points are pulled and collected to a single point which can be moved. All the points gathered there will be moved together.
- Lock/Unlock
- This selection will lock the selected control point(s) so it may not move.
- Select
- You can choose all the control points, or you can in verse selection.
- Smooth
- You can smooth disorderly selected control points by three methods.
Gauss Smooth
Moving Average
Horizontal Moving Average
Vertical Moving Average
- Group
- You can make the selected control points one group. When you select the control point of a group, all the control points of the group are selected automatically.
- Ungroup
- The selected group is dispersed.
- Ungroup All
- All the groups are dispersed.
Shape
An object is transformed into a multiple pillar etc.
- Crystallized
- Control points are located only at vertices.
View
- Zoom
- You can expand the editing screen. You can also change magnification by using the wheel of the mouse.
- Grid
- You can display a grid. The control points will snap to the grid.
- Disp Mesh
- You can change a control point and the display of the chosed section.
- Display Background/Load Background
- You can place an image in the background of the editing screen.
The files types of the image which can be used are JPEG/PNG/BMP/PSD.
*TSUCHI can use the three types of image files outputted by UTSUSHI. - Level of Detail
- The level of detail is displayed in three distances: Near, Middle and Far.
- Edit Line
- You can choose Line to edit by TSUCHI.
Sides
You can select the section which reflects the movement of the control point of the section edited.
- Select All
- All the sections reflect movement of the control point of the section currently edited.
- Select None
- Only the control point of the section edited now is moved.
- Reverse
- Selection is reversed.
- Every 16-1 point
- You can choose the section for every specified number by turns.
Every 16 point 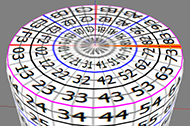
Every 8 point 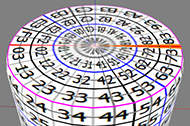
Every 4 point 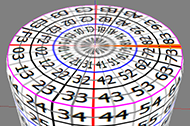
Every 2 point 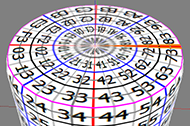
- Custom
- You can choose the section to choose easily.
- Folder
- You can arrange selected control points to appear more smooth.
Section
You can select the shape of section in MAGE mode.
Tools
You can use the plug-ins for TATARA which are in the same folder as this program.
When you use it for the first time, you have to register it.
- Polyhedron plug-in (Polyhedron.pgt)
-
You can choose ten or more kinds of polyhedrons.
*The aspect ratio of the map file specifies 32x32 automatically. - Stairs plug-in (Stairs.pgt)
-
You can specify the aspect ratio of the sculpted prim.
You can make stairs of four types:
You can specify the number of steps for the stairs.
You can specify the height of the sides of the stairs (the “sleeve”) if stairs with a sleeve are chosen.
*You can't use plug-ins for ROKURO Pro. But ROKURO Pro 3.0 User can use the plug-in by your password of ROKURO Pro 3.0 and it's plug-in.
*You can't change the user name. - Coil plug-in (Coil.pgt) [option] download
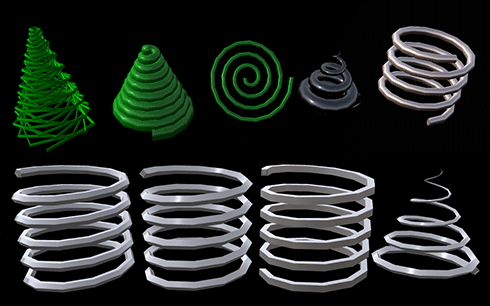
Total coils : You can specify the number of turns of the coil.
Arranged    : The coordinates of XY plane of vertexes are arranged.
Size        : You can specify the aspect ratio of the sculpted prim.
clockwise / anticlockwise : You can specify which direction the coil is twisted.
Cylinder    : You can use Cylinder stitching type.
Shape       : You can specify the form of the section of the coil.
Rotated     : You can rotate the form of the section of the coil.
Crystallized: You can arrange a control point only on a vertex in the section of the coil.
Width       : You can specify the thickness of both edges of a coil.
Z Position  : You can specify the height of both edges of a coil.
Diameter    : You can specify the diameter of both edges of a coil.
When you click OK button, you will make a coil.- Panels plug-in (Panels.pgt) [option] download
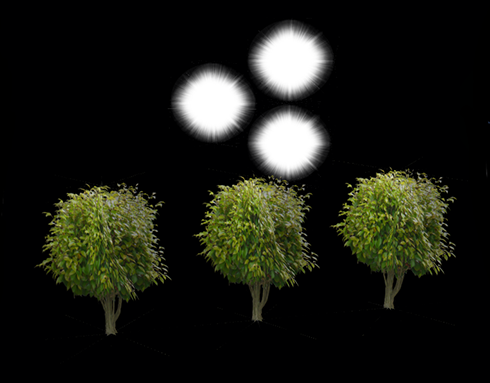
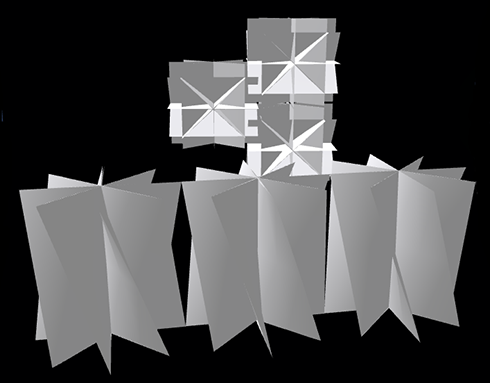
Panel Type       : You can specify the arrangement of your panel.
Panel Dimension  : You can specify how many the axis of rotation of the panels are used.
Panel Count      : You can specify how many panels are used for the axis of rotation.
Panel UV Height  : You can specify the number of the control points of a lengthwise direction as one panel.
Twisted          : You can twist the panels.
Your click of the OK button will make the Panels.- Cam plug-in (Cam.pgt) [option] download

Type         : You can select the cam type from following types.
 -Normal         : Normal Cam
 -Hole Torus     : The cam which has a hole in the center
 -Square Torus   : The cam with the square cross-section
 -Circular Torus : The cam with the circular cross-section
Size         : You can select the aspect ratio of the sculpted prim from 64x16, 32x32, or 128x8.
Count        : You can select the count of the cam nose.
Depth        : You can specify the depth of the Cam.
Crystallized : The gear is crystallized.
Your click of the OK button will make the cam.- Gear plug-in (Gear.pgt) [option] download
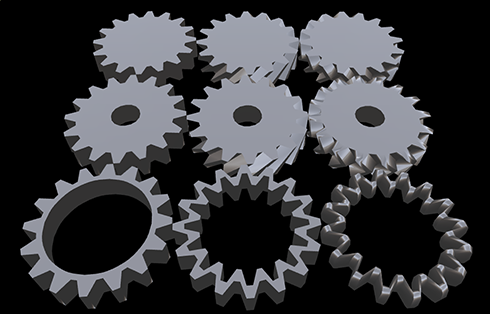
Type  : You can specify the type of gear from the following Gear Types.
 -Normal Gear
 -Helical Gear
 -Double Helical Gear
 -Hole Normal Gear
 -Hole Helical Gear
 -Hole Double Helical Gear
 -Square Torus Gear
 -Circular Torus Gear
Size  : You can specify the aspect ratio of the sculpted prim.
z     : You can specify z of the gear.
Whole Depth  : You can specify the depth of the Gear.
Crystallized : The gear is crystallized.
Big Hole     : The hole gear has a big hole.
Your click of the OK button will make a Gear.- Twisted Ring plug-in (TwistedRing.pgt) [option] download
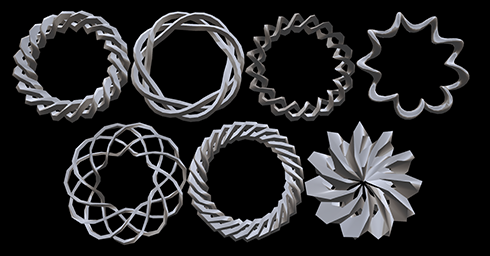
Type  : You can specify the type of Twisted Ring from following Twisted Ring Type.
 -Single Twisted Ring
 -Double Twisted Ring
 -Triple Twisted Ring
 -Quadruple Twisted Ring
Size     : You can specify the aspect ratio of the sculpted prim.
Diameter : You can set the radius of twisting.
Count    : You can set the count of twisting.
Shape    : You can set the form of the cross-section of the ring.
Width    : You can set the radius of the cross-section of the ring.
Rotation : You can set the count of rotation of the cross-section of the ring.
Your click of the OK button will make a Twisted Ring.- Boxes plug-in (Boxes.pgt) [option] download
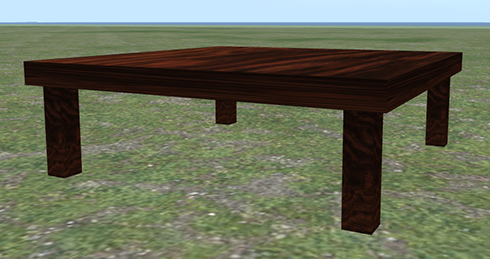
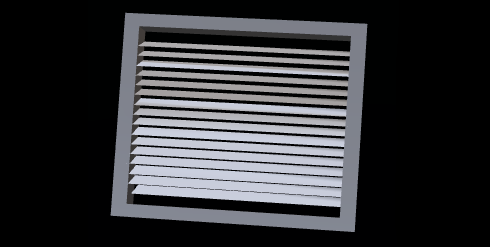
Box Type     : You can specify the box type from 4 types.
Box Count    : You can specify the count of boxes. You can mix other types of box.
Crystallized : You can specify whether the boxes are crystallized or not.
LoD Level    : You can specify the Level of Detail of Boxes from three types.
Size         : You can specify the aspect ratio of the sculpted prim from two types.
When you click the OK button, you can make a box or multiple boxes.- Cloth plug-in (Cloth.pgt) [option] download

Please lock the control point which you want to fix.
The control points which are not fixed are treated as the cloth.
You can specify the following parameters.
-Method     : You can specify the method of physics simulation.
-Viscosity  : You can specify the viscosity rate of the cloth model.
-Spring     : You can specify the spring rate of the cloth model.
-Damping    : You can specify the damping rate of the cloth model.
-Loop Count : You can specify the count of computing of the simulation.
When you click the OK button, you can make it.- Height Cloth plug-in (HeightCloth.pgt) [option] download
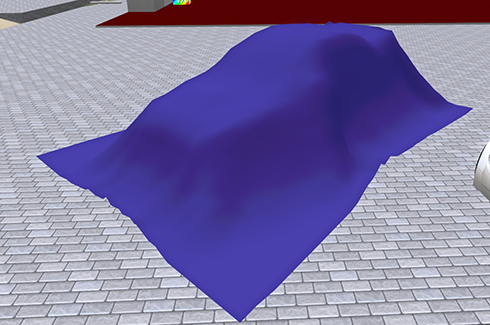
You can easily make the veil put on the new product.
You can make it by height image data of your object by UTSUSHI. It is freeware.
You can specify the following parameters.
-Height Data: You can select png, jpeg and bmp file.
  Software changes the read picture into the gray scale of 256x256.
  Black is low and white is high.
-Size       : You can specify the aspect ratio of the sculpted prim from three types.
-Width      : You can specify the width of cloth. I can check it on the Height Image.
-Height     : You can specify the Height of cloth. I can check it on the Height Image.
-Offset:X   : You can specify the position x of cloth. I can check it on the Height Image.
-Offset:Y   : You can specify the position y of cloth. I can check it on the Height Image.
-Sticky     : When the cloth is touched to height data, the cloth is locked.
-Method     : You can specify the method of physics simulation.
-Viscosity  : You can specify the viscosity rate of the cloth model.
-Spring     : You can specify the spring rate of the cloth model.
-Damping    : You can specify the damping rate of the cloth model.
-Loop Count : You can specify the count of computing of the simulation.
When you click the OK button, you can make it.- Balloon plug-in (Balloon.pgt) [option] download
-
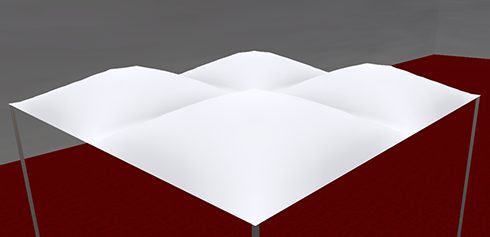 Please lock the control point which you want to fix.
The control points which are not fixed are treated as the balloon.
You can specify the following parameters.
-Pressure   : You can soecify the internal pressure.
-Method     : You can specify the method of physics simulation.
-Viscosity  : You can specify the viscosity rate of the Balloon model.
-Spring     : You can specify the spring rate of the cloth model.
-Damping    : You can specify the damping rate of the cloth model.
-Loop Count : You can specify the count of computing of the simulation.
When you click the OK button, you can make it.
Bitmap (Top of the Bitmap pane)
- Copy
- The selected control points are copied to the clipboard.
- Paste
- The control points on the clipboard are pasted on the basis of the control point selected on the Bitmap tab.
- Equal Intervals
- The interval of three or more selected control points is evenly arranged.
- Equal Distance
- The selected control point is rearranged at equal intervals on the line which connects them.
- Smooth
- You can smooth disorderly selected control points.
- Magnet
- The selected control points are pulled and collected to a single point.
Keyboard Operation
Move
If you push an arrow key, the selected control point is moved 1 pixel.If you press an arrow key and the Shift key simultaneously, it will move 8 pixels.
If you are displaying the grid, control points are moved along the grid points. You can't use the Shift key.
If you press the page up key and the page down key while using the TSUCHI tab, a control point will be moved in the depth direction.
*While you are displaying the Bitmap tab on another pane, the events of the keyboard are sent to a pane on the mouse cursor.
History
11/25/11 TATARA 6.205
-The bug of 3 pane mode was fixed.12/11/11 TATARA 6.204
-The system of ScrollBars is updated.11/19/11 TATARA 6.0.203
-The function to save Collada Physics shape file was added.-The function to save Lowest LoD file was added.
-The bug of the scrollbar of the edit pane was fixed.
-The bug of the scrollbar of the edit pane on Bitmap mode was fixed.
10/22/11 TATARA 6.0.201
-You can only use tools menu on TSUCHI tab.-The bugs of the shortcut keys were fixed.
-The rearrangement function by Edit Level was improved.
10/01/11 TATARA 6.0.200
-The function of saving LOD Collada file corresponded to Mesh Release 2.09/24/11 TATARA 6.0.199
-The keyboard shortcuts were added to the items on the Bitmap menu.-The load bug of the Obj file was fixed.
-The bug of the display in ROKURO mode was fixed.
-The bug of the display in TOKOROTEN mode was fixed.
-The bug of the display in Texture mode was fixed.
08/20/11 TATARA 6.0.197
-The bug which cannot drag the one control point was fixed.-The operation of Ctrl+Drag the corner range control point was changed.
-Equal Interval all the control points are chosen was improved.
-Smooth of Shpere type was improved.
-The option to display the background panel on the preview of TSUCHI mode was added.
07/25/11 TATARA 6.0.192
-The bug of the Collada output was fixed.-The bug of management of a Collada output option was fixed.
07/16/11 TATARA 6.0.191
-The option of "Save low/medium/high LoD" on Collada Option Dialog was added. You can save High/Medium/Low Level of Detail Collada files.-The bug of selection function after scrolling on Bitmap tab was fixed.
-The bug of editing by arrow key on Bitmap tab was fixed.
-The origin of the object doesn't move when you open the OBJ file.
-Accuracy of the coordinate of the initial object improved.
-Shifting of the center coordinate of the sculpted prim by Maximze is prevented.
-The option of Maximize with Symmetry is "Checked" by default.
-Rename Dialog was updated.
06/06/27 TATARA 6.0.189
-The bug of update function of the texture drawing was fixed.-The scroll function of the Bitmap tab was updated.
-The bug of setting value on Bitmap tab was fixed.
06/06/11 TATARA 6.0.188
-The deselect function was added. If all the control points you selected with shift key are already selected, they are deselected.05/31/11 TATARA 6.0.187
-First Release.09/06/10 TATARA 5.0.159a
09/23/09 TATARA 4.0.93
05/29/08 TATARA 3.0.59
04/18/08 First Release.
Trial & Buy
A trial period is for three days. In a trial period, you cannot output Sculpted Prims.
When starting software, a dialog box asking for a serial code (license) is displayed.
After the trial period has passed, it becomes impossible to start.
Please purchase TATARA Serial Code (license) from the TATARA Serial Box in-world at: KANAE PROJECT Shop.
Images
Mesh Image
Mesh image file download
Made by TATARA/KUMIKI logo
It uses the initial character of the Kanji character of TATARA/KUMIKI as seal.
It can be resized in the size which you wish.
Credits
- GLScene http://glscene.sourceforge.net/wikka/HomePage
- GLScene is released to the public as open-source under Mozilla Public License. http://www.mozilla.org/MPL/
- Graphics32 http://www.graphics32.org
- Graphics32 is released to the public as open-source under Mozilla Public License. http://www.mozilla.org/MPL/
- GDI plus http://www.progdigy.com
- GDI plus is released to the public as open-source under Mozilla Public License. http://www.mozilla.org/MPL/
- ImageEn
- by HiComponents 1998-2010
Thanks to KJ Georgette for help with this Readme file.